
On to happier news, I am working on a nice comfy summer dress. I'm not going to say too much about it now, for if I do, I might never finish. However, I did want to share a tip for all the beginners out there, like me, on how to "stitch in the ditch".
My stitch-in-the-ditch sewing has been how do we say, well, UGLY! I used to just pin the facing and then pray to whoever was listening that when I stitched from the front side that the back side would get caught under the needle. Half the time, I was successful, the other half of the time involved pouty lips, a seam ripper, and a strong drink. It would honestly take me 10 tries to even get 90% of the back side caught under the front. The other 10% I would just wave it all away and pretend it looked nice. Well, no more! I'm sure this is obvious to everyone, but maybe, if there is someone out there like me who laments the thought of having to "stitch in the ditch". Here is how to make your results come out nicely each and every time.
1.

Pin the facing to the back. Be generous with your use of pins. I used a contrasting thread so that it would be easier to pull out once the stitch-in-the-ditch stitching is done.
2.

Slip stitch the back facing to the main body fabric. Make sure to catch the body fabric a little bit under the ditch line.
3.
Turn the project over and "Stitch in the ditch" from the front side!
Ta da! You're done!

Back View
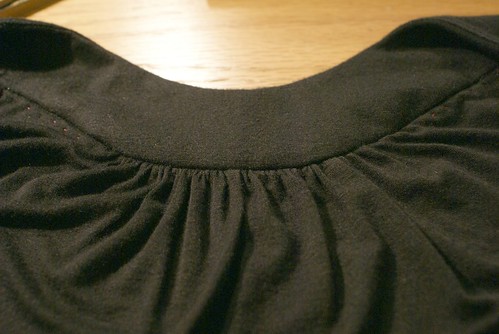
Front View
Sorry for the black fabric. I know it can be hard to see. I tried overexposing all the pictures a bit to show more contrast. If you know of a nicer way, please let me know. I'm always up for improving my sewing.
11 comments:
That looks like a great method! I usually just hand stitch things in place rather than the stitch in the ditch method. It takes so much longer though! Thanks for sharing!
Do you have a preferred type of machine needle for sewing with knits?
I know what you mean about stitch in the ditch - it's so hit or miss! Thanks for the great how-to!
Hi Beth! I am working with a Schmetz stretch needle. Size 90/14. I think I could use something a little lighter but this one is working well for me. No puckering, no skipped stitches. The fabric is a rayon/poly blend so I'm not sure if that's also a factor, but, I've used this needle for other knits and it's also worked very well.
Just like Beth, I used to hand stitch only. Next time I'll try your method, it looks like the correct thing to do...
thanks!
Thank you for a wonderful tutorial!
This is a great tutorial on Stitching in the Ditch.... thankyou.
This makes a lot more sense :D
This must be the "loefller randal knockoff"? i may be wrong. I'm trying this stitch in the ditch thing but I'm not understanding. Do I lay the raw edge of the body fabric inside the two layers of the facing? When I pin am I catching all three layers? The back facing must reach lower down the garment so that the "ditch" on the reverse is a bit higher than the edge of the back facing, right? thank you for clarifying, otherwise very clear pictures and love ALL of your blogs! =D xoxo
Who knows where to download XRumer 5.0 Palladium?
Help, please. All recommend this program to effectively advertise on the Internet, this is the best program!
I can relate to feeling inspired by sewing projects but sometimes getting stuck.
Post a Comment